Set Up Space Cloud
The first step to start using Space Cloud is setting it up. Space Cloud requires several components to be running for proper functions. The most important components are:
- Gateway: Responsible for ingress traffic and generation of REST / GraphQL APIs.
- Runner: Responsible for communicating with K8s and deploying your services.
Luckily, we don’t have to interact with these components directly. Space Cloud ships with a utility named space-cli which bootstraps a cluster for us.
Installing Kubernetes
Space Cloud uses Kubernetes under the hood to provide all its features. The first step to installing Space Cloud is getting a Kubernetes environment up and running.
Make sure you have kubectl installed and have added it to your
$PATH.
Installing Kubernetes on Linux
Install the latest version of K3s.
Start K3s:
curl -sfL https://get.k3s.io | sh -s - server --disable traefik --docker
Copy the config file for future use
sudo chmod 775 /etc/rancher/k3s/k3s.yaml
mkdir ~/.kube
cp /etc/rancher/k3s/k3s.yaml ~/.kube/config
Installing Kubernetes on Windows / MacOS
Install the latest version of Docker Desktop.
We recommend enabling WSL2 on Windows for the best experience. Refer to this guide to enable WSL2 on Windows.
Don’t forget to enable Kubernetes from the Docker Desktop Dashboard.
Make sure you provide atleast 2 CPUs and 4GB Memory to the Docker Desktop VM. This isn’t required when using WSL2.
Installing Istio
Space Cloud requires Istio to work correctly. The default Istio profile works perfectly well.
Download the latest istio release:
curl -L https://istio.io/downloadIstio | sh -
Space Cloud has been tested with Istio versions
v1.8.X,v1.7.Xandv1.6.X.
Move to the Istio package directory and install Istio. For example, if the package is istio-1.8.0:
cd istio-1.8.0
./bin/istioctl install --set profile=demo
For more detailed Istio install instructions, visit the Istio Docs
Installing Space CLI
The first step is downloading space-cli. You can download a version for your particular platform:
Unzip the compressed archive.
For Linux / Mac: unzip space-cli.zip && chmod +x space-cli
For Windows: Right-click on the archive and select extract here.
Copy the space-cli binary to your environment path variable for global usage.
For Linux / Mac: sudo mv ./space-cli /usr/local/bin/space-cli.
For Windows: Add the path of the space-cli.exe to the environment variable PATH for making space-cli accessible globally.
Setting up Space Cloud
We can set up all Space Cloud components using a single command.
space-cli setup
For details on how to customise Space Cloud installation, visit the customisation docs.
Verify Installation
Verify the installation run the following docker command:
kubectl get pods -n space-cloud -w
All the pods shown should be in the running state.
Creating your first project
Now that we have got Space Cloud setup, we can open Mission Control (Space cloud’s admin UI) on http://localhost:4122/mission-control.
If you are using Docker Desktop, open http://localhost/mission-control
A screen like this greets you:

Hit on the CREATE A PROJECT button to open the following page:

Enter a project name. You can stick to MyProject for this one.
Hit the Create Project button.
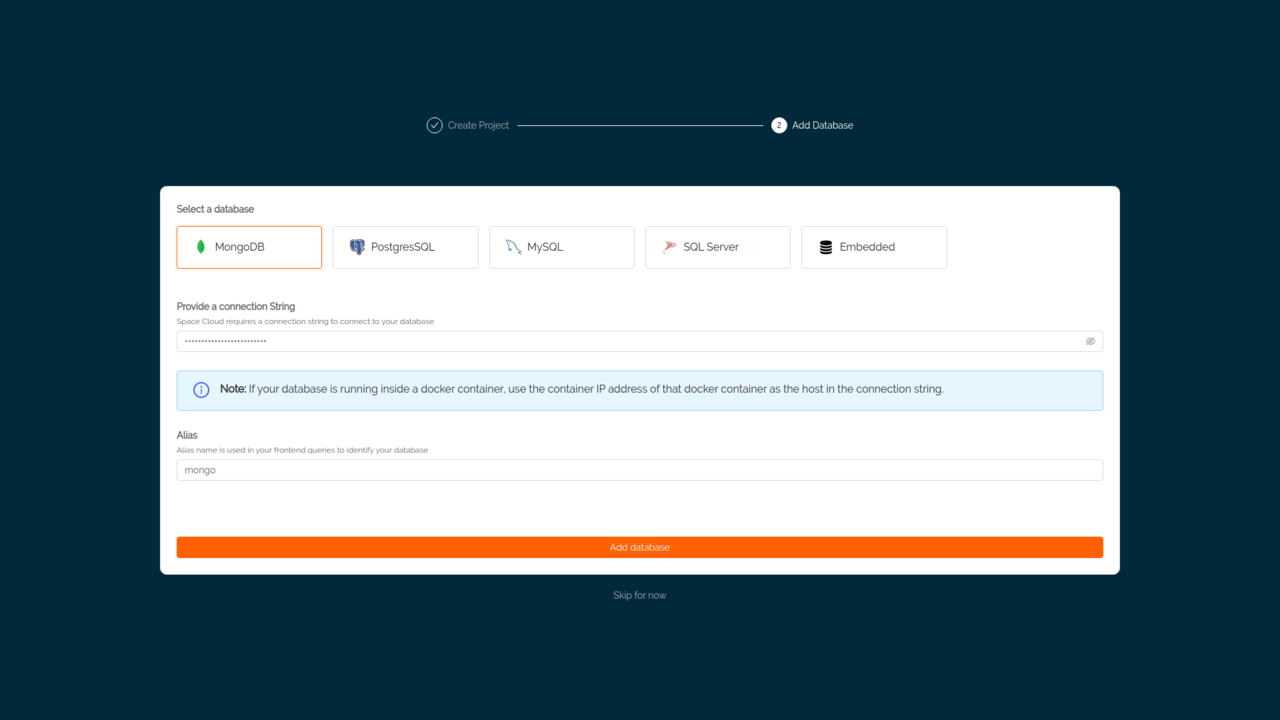
Mission Control now asks for setting up a database:

If you already have one, feel free to configure it. For now, we’ll skip this step since we don’t have a database running at this point.
You can destroy the Space Cloud cluster along with all the deployments by running the
space-cli destroycommand.
Next Steps
Great! We have successfully set up a Space Cloud on Docker and created our first project with it.
Continue to the next guide to add a database to our newly created project and perform some queries on it.


