Deploying a Service
Not everything can be achieved by CRUD operations. Sometimes we need to write some backend code to get some work done.
In this guide, we will:
- Deploy a dockerized app on Space Cloud.
- Expose the APIs of the REST service to the outside world by setting up
Space Cloud Routes.
Note: Make sure you have followed the Setup Space Cloud guide in the
Space Cloud Basicstrack. We’ll be building up from there.
Advantage of deploying with Space Cloud
When running on Kubernetes, Space Cloud gives you the following benefits:
- Complete end to end encryption.
- Advanced deployment patterns like Blue/Green Deployment, A/B Tests, etc.
- Advanced service to service authentication policies.
- Autoscaling including scaling down to zero.
What are we going to deploy
We’ll set up a simple HTTP server which has the following:
- An endpoint to add two numbers.
- An endpoint to double the number provided.
Following are the endpoints of our REST service:
| Method | URL | Request Body | Response Body |
|---|---|---|---|
GET |
/add/:num1/:num2 |
N/A | {"value": RESULT } |
POST |
/double |
{"value": VALUE_TO_BE_DOUBLED} |
{"value": RESULT } |
POST |
/logger |
ANY JSON OBJECT |
{} |
Deploying the service
Space Cloud can deploy only docker containers as of now. So we need to dockerize our app. To speed things up, we will deploy a pre-built image.
Open Microservices > Deployments and hit the Deploy your first container button.
Our Service ID will be myapp and the Version will be v1.
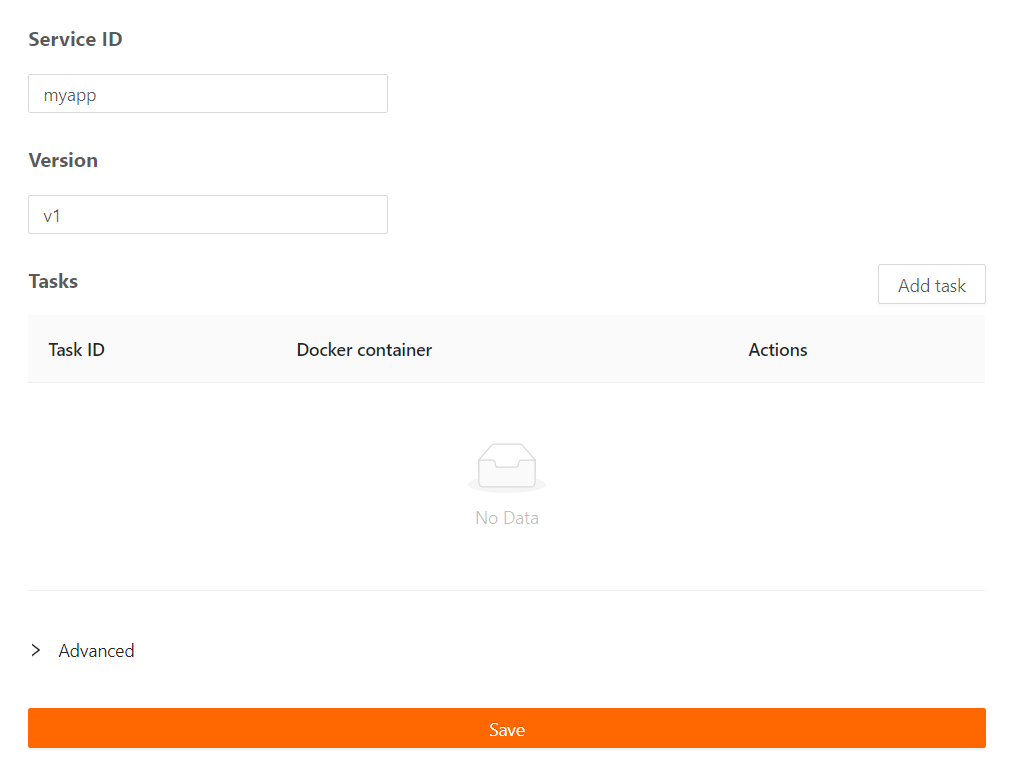
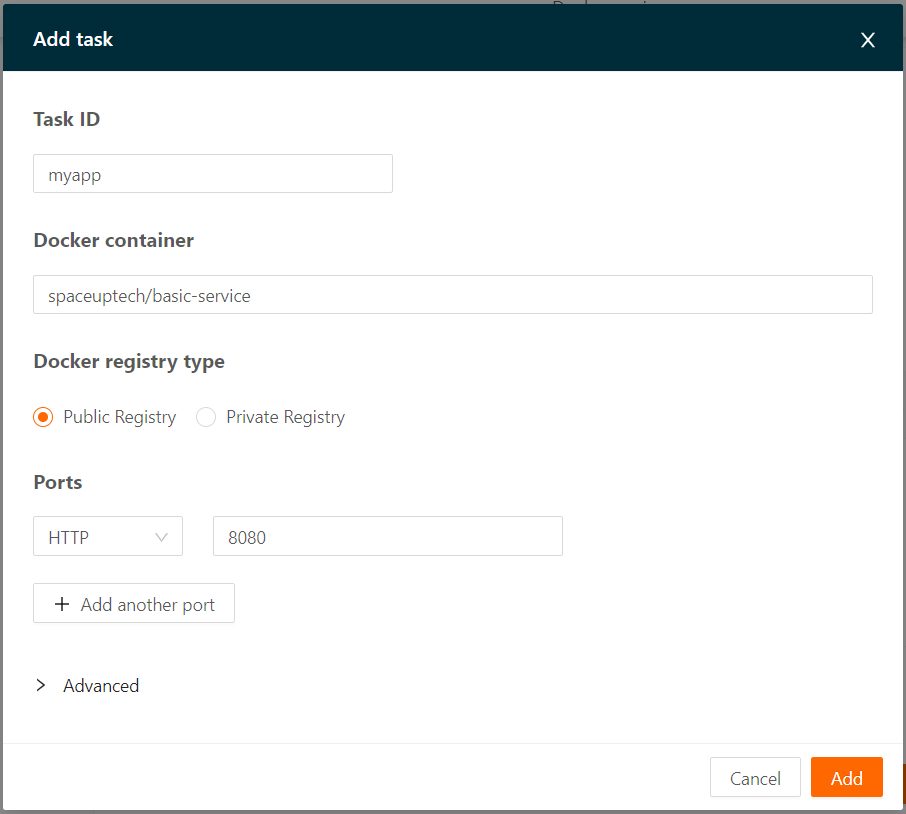
Now hit Add Task to add a container to our deployment. This is where we configure container level properties like docker image, resource constraints, etc.
Let the Task ID be myapp and Docker container be spaceuptech/basic-service. Also add a HTTP port 8080.
Finally hit Save and watch our service get deployed.
It can take upto a minute or so for a service to get deployed.
Hurray! We just deployed a dockerized REST service using Space Cloud. I know you want to celebrate, but let’s wait a min before we do that.
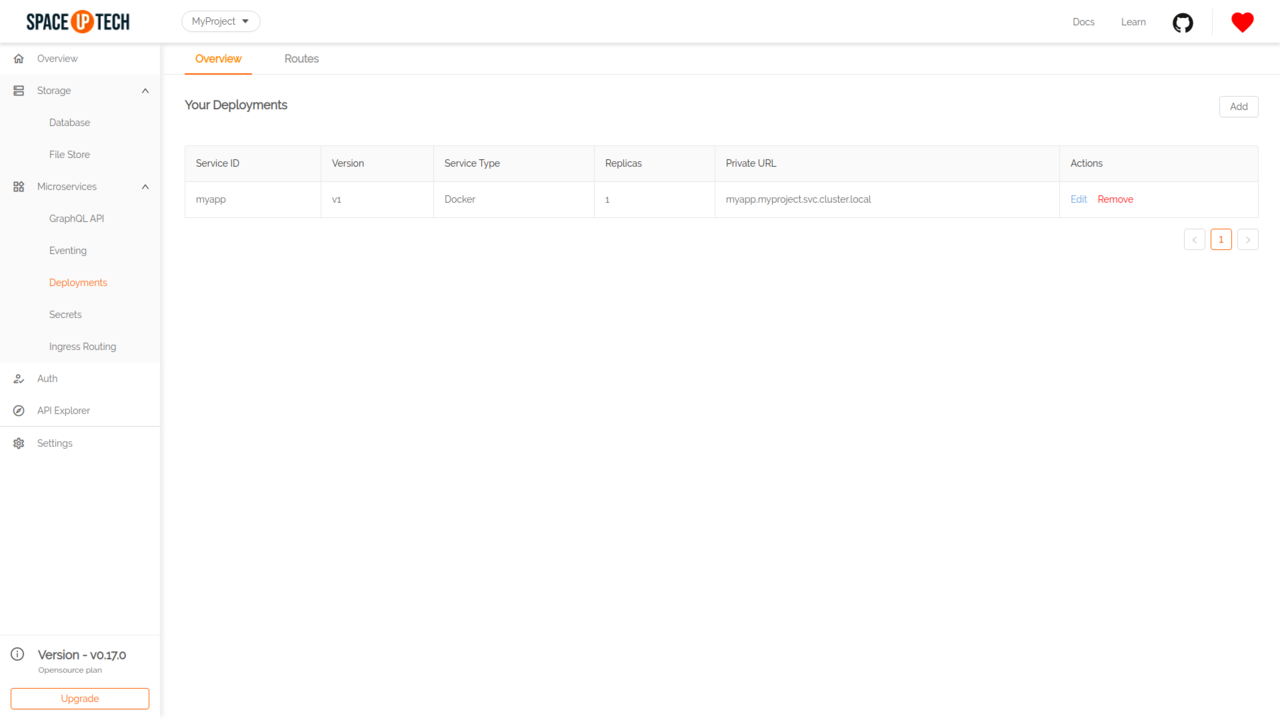
Verify the deployment
Checkout to the Overview tab of Deployments section in Mission Control and hit refresh. You should be able to see the service we just deployed like this:
Yess! Now you can celebrate! You deserve it for following this track so diligently.😛
Expose your API
Currently, the REST service we deployed is accessible from within the cluster only. We need to add Space Cloud Routes to expose our service to the outside world.
Let’s head over to the Ingress Routing section in the Microservices tab in Mission Control.
Hit Create your first route to open the following form:
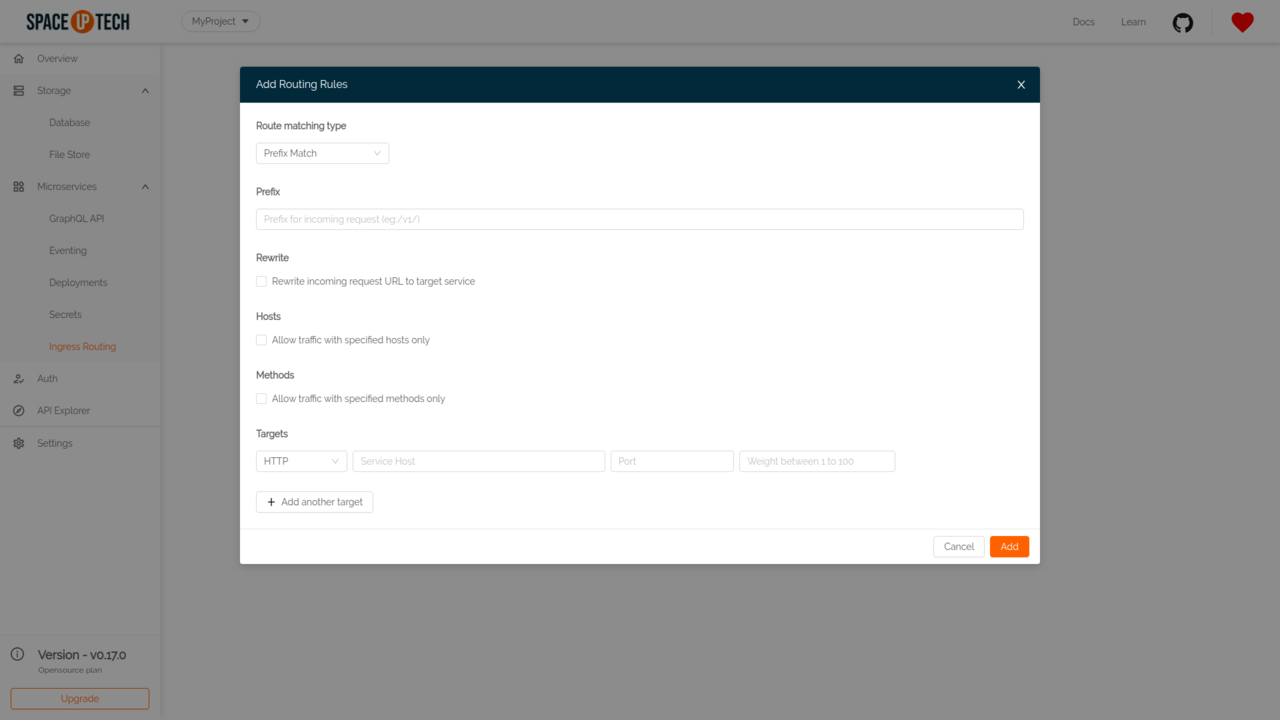
We’ll simply redirect all non Space Cloud traffic to our service for now.
You’ll need to provide the following details in the form:
| Route Matching Type | Prefix |
|---|---|
Prefix Match |
/ |
Targets:
| Scheme | Service Host | Port | Weight |
|---|---|---|---|
HTTP |
myapp.myproject.svc.cluster.local |
8080 | 100 |
Once you are done, hit Add.
To verify that our REST service is exposed, simply open another tab in your browser and enter:
http://localhost/add/1/2
You may have to use
http://localhost:4122/add/1/2depending on how you are running Space Cloud
You should be able to see the following response on your screen:
{
  "value": 3
}
Next steps
Awesome! We just deployed and exposed our first REST service!!!
There is a lot more we can do with Deployments. Space Cloud has amazing features like autoscaling, service communication policies, secret management, etc. built into it. Don’t worry, we’ll be covering all of these in another guide.
Continue to the next guide to create a GraphQL API on top of our service.


